How to Break In a New Folding Knife — Make It Smooth
You unbox your new knife, flip it open, and— it’s stiff. The action is gritty, the lock sticks, and closing requires two hands. This is completely normal — most folding knives need a break-in period before their action smooths out. But you don’t have to wait weeks of pocket carry to get there. With the right techniques, you can accelerate the break-in process and have your new knife gliding open and closed within an hour. Here’s how to break in a new folding knife properly, safely, and effectively.
Why New Knives Are Stiff
New folding knives are stiff for several reasons, none of which indicate a defect. Manufacturing tolerances are intentionally tight — it’s easier to wear in a tight pivot than fix a loose one. Factory lubrication is often applied conservatively and may be thick grease rather than light oil. Detent balls need their track to wear smooth. Washers (phosphor bronze or Teflon) need to seat against the blade tang. And in some cases, manufacturers deliberately set the pivot tight so the knife ships centered — over time, the action loosens naturally. Understanding this helps set expectations: your knife isn’t broken, it just needs exercise.
Method 1: The Manual Break-In (No Tools Required)
The simplest approach: open and close your knife — a lot. Sit on the couch watching a movie and cycle the action 200-500 times. This wears the detent track, seats the washers, and distributes lubricant throughout the pivot. If your knife has a flipper tab, switching between different deployment methods (thumb stud, flipper, Spydie-flick) ensures all contact surfaces get worked. For back locks and slipjoints, open and close the knife fully, letting the mechanism “walk” through its full range of motion. This method is zero-risk and requires no disassembly. The downside: it takes time and patience. Most knives show noticeable improvement after 200 cycles and are significantly smoother after 500.
Method 2: Clean and Re-Lubricate
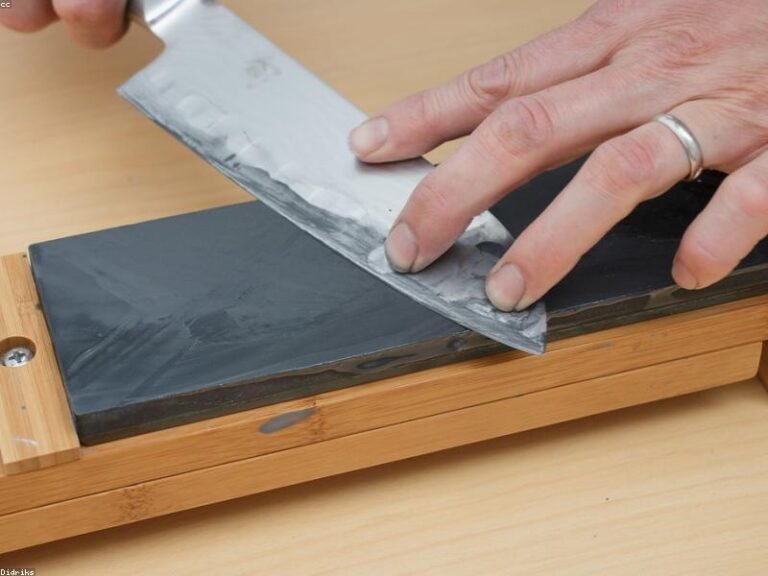
Factory lubrication isn’t always optimal. Some manufacturers use thick grease that gums up the action; others use minimal oil that has dried during shipping and storage. Flushing the pivot with a light oil can work wonders. Use a high-quality knife lubricant like KPL (Knife Pivot Lube), Nano-Oil, or Tuf-Glide — these are specifically formulated to reduce friction without attracting dust. Apply a drop to each side of the pivot, work the action 20-30 times, and you’ll often feel an immediate improvement. For a deeper clean without disassembly: flood the pivot area with isopropyl alcohol (90% or higher), work the action to flush out old grease and debris, let it dry completely, then apply fresh lubricant. This removes manufacturing debris that can cause grittiness. Find KPL Knife Pivot Lube on Amazon.
Method 3: Pivot Adjustment
Many knives ship with the pivot screw over-tightened. A simple adjustment can transform the action. Using the correct size Torx bit (most common: T6, T8, or T10), loosen the pivot screw in tiny increments — 1/16 to 1/8 of a turn at a time. After each adjustment, cycle the action and check for blade play. The goal is the sweet spot: the blade deploys smoothly with minimal resistance, yet has zero side-to-side blade play when locked open. If you introduce blade play, tighten slightly. If the screw loosens over time with use, apply a tiny dab of blue Loctite (242) to the threads before reassembling. Important: Many knives have a free-spinning pivot that requires two drivers (one on each side). Don’t force it — if the screw spins without loosening, you need to hold the opposite side. Get a Torx bit set on Amazon.
Method 4: Full Disassembly and Tuning
For persistent grittiness or stiffness, a full disassembly allows you to clean every component, polish contact surfaces, and reassemble with optimal lubrication. Important: Disassembling your knife will void the warranty with some manufacturers (Spyderco is notorious for this; Benchmade and Civivi are generally more lenient). Know your warranty before disassembling.
During disassembly: clean all components with isopropyl alcohol. Inspect washers — flip them over if one side is worn more than the other. Polish the detent track on the blade tang with a very fine abrasive (2000+ grit sandpaper or metal polish) if it feels rough. Check for burrs on the detent ball hole and remove with fine sandpaper if found. Apply a thin coat of lubricant to both sides of each washer and the detent ball. Reassemble, adjust pivot tension to the sweet spot, and Loctite if desired. A properly tuned knife after disassembly will feel like a completely different — and better — tool.
Break-In Methods Comparison
| Method | Tools Required | Time | Effectiveness | Risk Level |
|---|---|---|---|---|
| Manual Cycling | None | 1-2 hours (while multitasking) | Good | None |
| Clean + Re-Lube | Isopropyl alcohol, lubricant | 10-15 min | Very Good | Very Low |
| Pivot Adjustment | Torx driver set | 5 min | Excellent | Low (may introduce play) |
| Full Disassembly | Torx set, lubricant, Loctite | 30-60 min | Maximum | Moderate (voids some warranties) |
Lock-Specific Break-In Tips
Liner Locks and Frame Locks: The detent ball is the main source of initial stiffness. Cycling the action wears a smooth track in the blade tang. If the lock bar is difficult to disengage, it’s often because the lock face needs to seat — 200-300 cycles usually resolves this. Don’t bend the lock bar to “loosen” it; you’ll compromise lock security.
AXIS / Crossbar Locks: These typically break in quickly. The omega springs need a few cycles to settle into their optimal flex pattern. If the bar is gritty, a drop of oil on each side of the bar track smooths things out. Do not stretch or modify the omega springs — replacements are available if a spring breaks (rare but possible after years of use).
Button Locks: Button locks should feel smooth out of the box — if they’re gritty, there’s likely debris in the button channel. A flush with alcohol followed by light lubricant typically resolves this. The button spring doesn’t wear significantly over time; stiffness is usually pivot-related.
Compression Locks: The compression lock tab may feel sharp or stiff initially. The tab edge breaks in as you depress it repeatedly — don’t file or sand it unless it’s genuinely painful. The lock’s tendency to “stick” (lock stick) can be reduced by applying graphite (pencil lead) or Sharpie ink to the lock face where it contacts the blade tang. This reduces friction without compromising security.
Frequently Asked Questions
How long does it take to break in a new knife naturally?
With regular daily use (opening/closing 10-20 times per day), most knives settle into their optimal action within 2-3 weeks. The detent track polishes smooth, washers seat, and lubricant distributes. If your knife still feels unacceptable after a month of regular use, consider methods 2-4.
Can I use WD-40 to lubricate my knife pivot?
WD-40 is not an ideal knife lubricant. It’s a water displacer and solvent, not a long-term lubricant — it will evaporate quickly and leave minimal protection. Use a dedicated knife oil (KPL, Nano-Oil) or at minimum a lightweight mineral oil. WD-40 is fine for cleaning and rust removal but shouldn’t be your pivot lubricant.
Will a stiff knife “fix itself” over time?
Most will improve with use, but some issues (grit from manufacturing debris, over-tightened pivots, dry washers) won’t resolve without intervention. At minimum, adding lubricant and cycling the action will accelerate the process significantly.
Is it worth upgrading to aftermarket bearings?
For most production knives, no. Modern ceramic ball bearings are already more than adequate. Aftermarket bearing upgrades (like Skiff bearings) primarily benefit older designs that came on washers or had poorly finished bearing pockets. The improvement is real but subtle — only worth the cost for knives you truly love and plan to keep long-term.