Kitchen Knife Sharpening at Home — The Weekly Ritual That Keeps You Razor Sharp
Why Sharpening Your Own Knives Is a Life Skill
A sharp knife is safer, faster, and more enjoyable to use than a dull one. That’s not opinion — it’s physics. A dull blade requires more force to cut, which means less control and a higher chance of the knife slipping. A sharp blade glides through food with minimal pressure, giving you precision and predictability. If you cook regularly, learning to sharpen your own kitchen knives at home is one of the highest-ROI skills you can develop.
We’ve been sharpening kitchen knives for over a decade, and we’ve made every mistake in the book. Scratched blades, uneven bevels, edges that were somehow duller after sharpening than before — we’ve done it all. The good news is that sharpening is a skill anyone can learn, and with the right tools and technique, you can put a shaving-sharp edge on your kitchen knives in under 10 minutes.
How Often Should You Sharpen?
This is the most common question we get, and the answer frustrates people: it depends. It depends on your knife steel, your cutting board material, how often you cook, what you’re cutting, and how sharp you need your knives to be.
Here’s a practical framework that works for most home cooks:
- Daily maintenance (honing): Use a honing steel or ceramic rod before every cooking session — or at least a few times a week. This doesn’t remove metal; it realigns the microscopic edge that bends over with use. A few passes on a honing steel can restore a blade’s performance for days or weeks without actually sharpening it.
- Touch-up sharpening: Every 1-3 months for knives you use daily. A quick session on a fine grit whetstone (3000-6000 grit) or a ceramic rod to bring back a fading edge. This takes 2-3 minutes per knife.
- Full sharpening: Every 6-12 months, or when the knife fails the paper test (it won’t cleanly slice through a sheet of printer paper). Full sharpening involves establishing a new edge on a medium grit stone (800-1000 grit) and refining on finer stones.
The most important skill is knowing the difference between a dull edge that needs sharpening and a rolled edge that just needs honing. If your knife still cuts paper but catches or tears, hone it. If it won’t cut paper at all, sharpen it.
Tools You Need to Get Started
There are three categories of sharpening tools. Each has its place, and you don’t need all of them — pick the approach that matches your budget, patience level, and how sharp you need your knives to be.
Whetstones: The Enthusiast Choice
Japanese water stones (whetstones) are the traditionalist’s tool of choice, and for good reason. They give you complete control over the sharpening angle, they work on any blade steel, and the results are unmatched by any other method. The downside is the learning curve — expect your first few sharpening sessions to produce mediocre results while you develop the muscle memory to hold a consistent angle.
For a home cook just getting started, you only need two stones: a medium grit (800-1000) for establishing the edge, and a fine grit (3000-6000) for refining and polishing. The King KW65 combination stone (1000/6000 grit) is the classic entry point and costs around $30. It’s not the fastest-cutting stone, but it’s forgiving, produces excellent results, and has taught more people to sharpen than any other stone on the market.
If you want to step up, a Shapton Pro (Kuromaku) 1000-grit stone is the enthusiast favorite. It cuts faster than the King, dishes (wears unevenly) much slower, and doesn’t require soaking — just splash water on the surface and start sharpening. At around $45-50, it’s worth the premium if you’re going to sharpen regularly.
Guided Systems: Easiest to Learn
If the idea of holding a steady angle freehand makes you nervous, a guided sharpening system is your friend. These systems clamp the knife in place and use a rod with a stone attached at a fixed angle, eliminating the need to hold the angle yourself. Results are consistent and repeatable from day one, and some systems can produce edges that rival freehand sharpening.
The Work Sharp Precision Adjust is our top recommendation for home cooks. It offers angle adjustment from 15 to 30 degrees, comes with three grits (320/600/ceramic), and produces excellent results on kitchen knives from paring knives to 10-inch chefs. The learning curve is nearly zero — clamp the knife, set the angle, and make strokes until you’ve raised a burr. At around $60, it’s the best value in guided sharpening.
Check Work Sharp Precision Adjust on Amazon →
The Lansky Deluxe system is the budget alternative at around $40. It’s been around for decades and works fine, though the clamp design is less refined than the Work Sharp. If you’re on a tight budget and want guided sharpening, it gets the job done.
Electric Sharpeners and Pull-Throughs: Proceed with Caution
Electric and pull-through sharpeners are convenient, but most of them are terrible for your knives. Here’s why: they use aggressive abrasives at fixed angles that remove far more metal than necessary, dramatically shortening the life of your blades. We’ve seen decent kitchen knives reduced to toothpicks after a few years of regular pull-through sharpening.
The exception is higher-end electric sharpeners with multiple stages and angle guides, like the Chef’sChoice Trizor XV. These use a three-stage process (coarse diamond, fine diamond, stropping/honing) that’s far more controlled than cheap pull-throughs. If you absolutely want electric convenience and you’re willing to spend $130-150, the Trizor is the only electric sharpener we’d recommend for quality kitchen knives. But for that money, you could buy an excellent whetstone set and have enough left over for a nice steak dinner.
Whetstone Sharpening: Step-by-Step Technique
If you’re going the whetstone route, here’s the method we’ve refined over years of sharpening:
- Soak your stone (if it’s a soaking stone like the King). Submerge it in water until bubbles stop rising — about 10-15 minutes. Splash-and-go stones like the Shapton just need water on the surface.
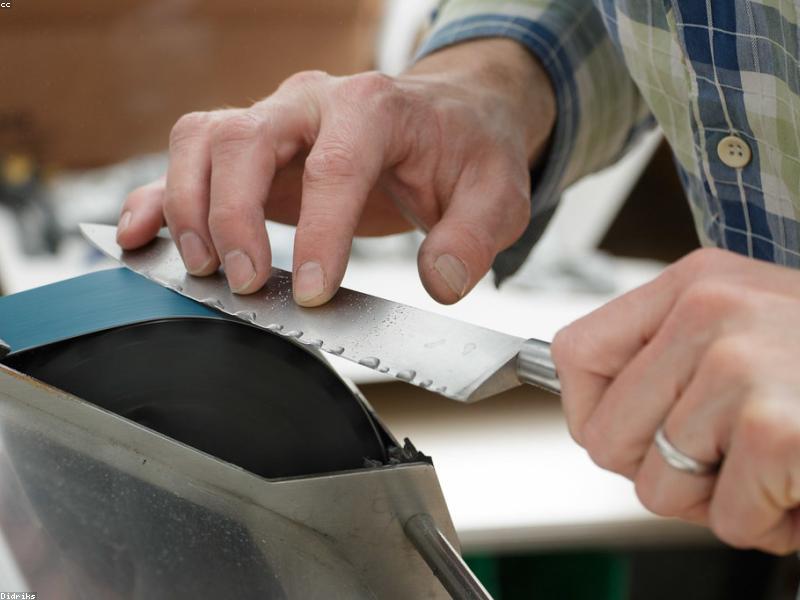
- Find your angle. Most Western kitchen knives are sharpened at 20 degrees per side. Japanese knives are typically 15 degrees. A simple trick: fold a piece of paper in half diagonally twice (22.5 degrees) or three times (roughly 15 degrees) and use that as a visual reference to set your angle. Hold the knife at that angle and lock your wrist.
- Raise a burr. Starting on your medium stone (800-1000 grit), push the blade across the stone edge-first as if you’re trying to slice a thin layer off the stone. Use moderate pressure on the edge-leading stroke and light pressure on the return. Work one side until you can feel a burr (a tiny lip of metal) along the entire opposite edge. This is the sign that you’ve fully apexed the edge.
- Flip and repeat. Switch to the other side and raise a burr there too.
- Remove the burr. Alternate sides with progressively lighter strokes — left, right, left, right — using edge-leading strokes and very light pressure. The burr will eventually break off.
- Refine on the fine stone. Move to your 3000-6000 grit stone and repeat the alternating light strokes. This polishes out the scratch pattern from the medium stone and produces a sharper, longer-lasting edge.
- Strop. Finish on a leather strop or even a piece of denim (your jeans work in a pinch) to remove any microscopic burr remnants. 10-15 strokes per side with very light pressure.
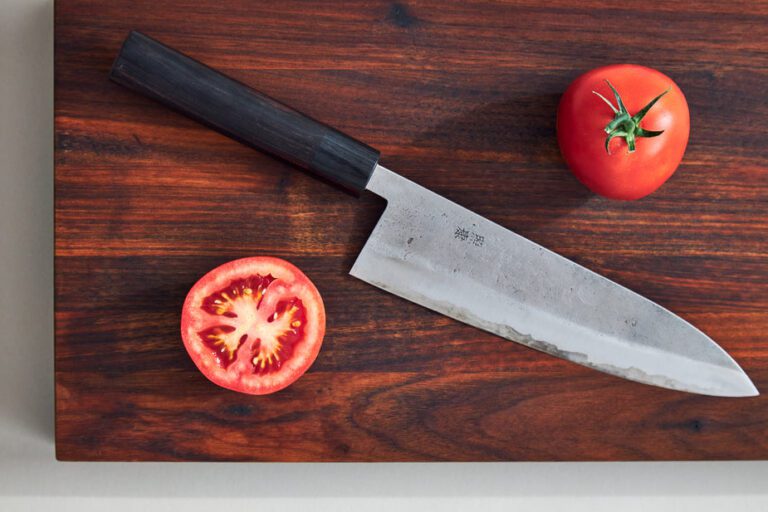
Test your edge by slicing through printer paper. A properly sharpened knife should cut cleanly with no tearing or catching. For an even sharper edge, try shaving arm hair or slicing a ripe tomato with no downward pressure — both are excellent real-world sharpness tests.
Maintenance Schedule for Home Cooks
Here’s a realistic maintenance schedule for someone who cooks 4-5 nights a week:
| Frequency | Action | Tool | Time per Knife |
|---|---|---|---|
| Before each use | Hone edge | Honing steel or ceramic rod | 30 seconds |
| Monthly | Touch-up on fine stone | 3000-6000 grit whetstone | 2-3 minutes |
| Every 6 months | Full sharpen (raise burr) | 800-1000 grit → fine stone | 7-10 minutes |
| As needed | Strop to maintain | Leather strop or denim | 1 minute |
Common Mistakes to Avoid
- Inconsistent angle: This is the #1 beginner mistake. Every stroke at a different angle creates a rounded, dull edge instead of a crisp apex. Lock your wrist and use your whole arm to move the blade — the wrist is what causes angle drift.
- Too much pressure: You’re sharpening a knife, not scrubbing a pan. Heavy pressure gouges the stone, flexes the blade, and creates deeper scratches than you can easily polish out. Moderate pressure to raise the burr, light pressure for everything else.
- Skipping the burr: If you never raise a burr, you never actually apex the edge. You’re just polishing the sides of the bevel without making it sharp. The burr is your proof that the two sides have met at a point.
- Neglecting the honing steel: Most home cooks could go 6+ months between actual sharpenings if they honed regularly. The honing rod is the cheapest, fastest way to extend the life of your edge.
- Using a pull-through sharpener on a good knife: We said it above, but it bears repeating. Those carbide V-notch sharpeners are knife destroyers in disguise. They rip out chunks of steel, leave a rough edge that dulls quickly, and over time remove so much metal that your chef’s knife starts looking like a fillet knife.
The Bottom Line
Sharpening your own kitchen knives isn’t a mysterious art reserved for Japanese master chefs. It’s a mechanical skill that any motivated person can learn in a weekend. Start with a simple setup — a King 1000/6000 combo stone and a honing steel — and practice on your least favorite knife until you get the feel for it. Within a month of regular practice, you’ll be producing edges that put your local knife-sharpening shop to shame. And there’s something deeply satisfying about slicing a tomato with a knife you sharpened yourself.
This article may contain affiliate links. If you purchase a product through one of these links, Bladeowl may earn a commission at no extra cost to you. This never influences our editorial independence or which products we recommend.