Knife Sharpening Jigs vs Freehand
The Great Sharpening Divide
Walk into any knife forum and mention “guided sharpening system” — you’ll get two very different reactions. The freehand purists will tell you that real sharpeners use whetstones, that jigs are training wheels, and that you’ll never truly understand your edge until you’ve spent hundreds of hours developing muscle memory on a soaking stone. The jig advocates will point to their mirror-polished, geometrically perfect bevels and ask you to guess whether they were done freehand or with a guided system. (They’ll be right every time — you can’t guess.)
Both camps have valid points, and both have blind spots. This guide breaks down the objective differences between guided sharpening systems (jigs) and freehand sharpening on whetstones — which path gets you to a razor edge faster, which one costs less over time, and which one will actually make you a better sharpener in the long run.
How Guided Systems Work — The Angle Guarantee
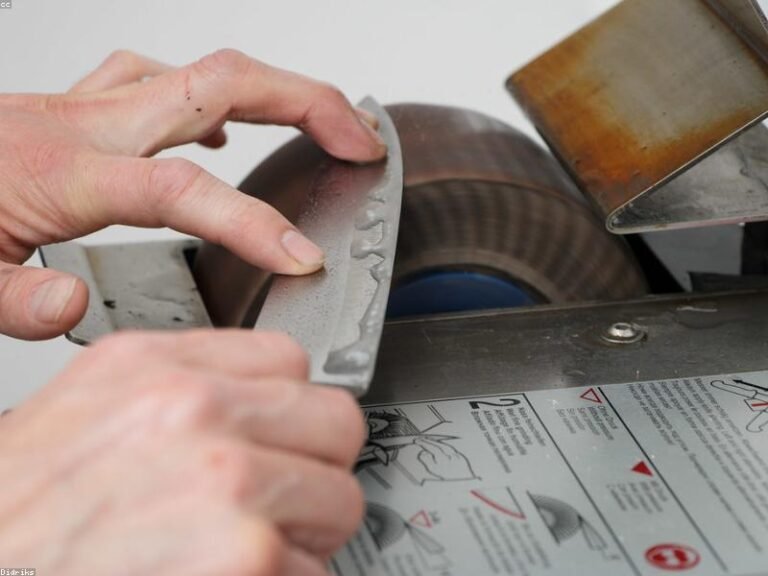
Guided sharpening systems solve the single hardest part of freehand sharpening: holding a consistent angle. Every guided system, from the $40 Lansky to the $700 Wicked Edge, uses the same basic principle — a clamp holds the knife stationary while a guide rod controls the stone’s angle of approach. The rod pivots from a fixed point, ensuring that every stroke hits the edge at exactly the same angle.
This angle consistency is the killer feature. Freehand sharpeners spend months or years developing the muscle memory to hold 15° or 20° steady for 50+ strokes per side. A guided system gives you that precision on day one. The results are immediately visible: crisp, uniform bevels with no wobble, no rounded shoulders, and no accidental angle changes mid-stroke.
The trade-off is speed. Every time you change grits, you swap the stone on the guide rod. Every time you flip the knife, you reposition the clamp or rotate the unit. A 1000-to-6000 progression that takes 8 minutes freehand might take 20 minutes on a guided system. Whether that matters depends on whether you’re sharpening three knives a week or thirty.
The Contenders: Guided Systems Compared
| System | Price | Angle Range | Stone Type | Best For |
|---|---|---|---|---|
| Lansky Deluxe 5-Stone | ~$45 | 17°, 20°, 25°, 30° | Alumina ceramic | Budget precision, EDC knives |
| Work Sharp Precision Adjust | ~$60 | 15°-30° (continuous) | Diamond + ceramic | Best value for money |
| KME Precision Sharpener | ~$200 | 13°-30° (continuous) | Diamond (4 grits) | Serious hobbyists, production sharpening |
| Edge Pro Apex | ~$255 | Any angle | Water stones (user supplied) | Kitchen knives, wide blades |
| Wicked Edge WE60 | ~$450 | 13°-35° (continuous) | Diamond (100-1000 grit) | Mirror edges, premium results |
Lansky Deluxe — The Entry Point
The Lansky Deluxe 5-Stone System is where most guided-system users start. For under $50, you get a clamp, three guide rods, and five stones (extra-coarse 70, coarse 120, medium 280, fine 600, and a sapphire polishing stone). The pre-set angle holes (17°, 20°, 25°, 30°) eliminate angle guessing, and the alumina ceramic stones cut well on standard steels.
The limitations: the clamp doesn’t hold large kitchen knives securely (blades over 8 inches flex during sharpening), the pre-set angles are limited to four options, and the stones dish with heavy use. But for pocket knives, hunting knives, and smaller kitchen blades under 7 inches, the Lansky delivers genuinely precise edges at an unbeatable price.
Work Sharp Precision Adjust — Best Value
The Work Sharp Precision Adjust has disrupted the guided-system market. At $60, it offers features that previously cost $200+: continuous angle adjustment from 15° to 30°, a stable tripod base, diamond plates (320, 600, and fine ceramic), and a clamp that actually holds full-size kitchen knives without flexing.
The diamond plates are the standout feature at this price point. They cut any steel including high-vanadium super steels (S30V, S90V, M390) that would glaze over the Lansky’s alumina stones. The continuous angle adjustment means you can match existing edge angles exactly instead of settling for the nearest pre-set hole. For most home sharpeners, the Precision Adjust is the sweet spot between price and capability.
KME Precision — The Serious Hobbyist’s Choice
The KME Precision Sharpener represents a significant step up in build quality and stone selection. The all-metal construction feels like a precision instrument, the spherical bearing in the rod holder provides butter-smooth movement, and the included diamond stones (140, 300, 600, 1500 grit) cover the full sharpening range with industry-standard abrasives.
KME’s ecosystem is a major advantage — you can buy additional stone holders and mount virtually any 4-inch stone from any manufacturer. Want to finish on a Shapton Glass 4000? A Naniwa Chosera 3000? Venev bonded diamond stones? All fit. The system also handles recurve blades, hawkbills, and other tricky profiles that flummox simpler guided systems. If you sharpen more than a dozen knives a month or want mirror bevels as a hobby, the KME earns its $200+ price tag.
Edge Pro Apex — The Kitchen Knife Specialist
The Edge Pro Apex uses a fundamentally different design from the clamp-based systems above. Instead of clamping the knife, the knife rests on a flat table while the stone guide arm moves above it. This table-based approach has one huge advantage for kitchen knives: it handles long, flexible blades that clamp systems struggle with. A 10-inch slicing knife or a flexible fillet knife sharpens just as easily as a 3-inch paring knife.
The Edge Pro uses standard 6-inch bench stones mounted in a carrier, so you can use Shapton Glass, Naniwa Chosera, or any other stone you prefer. The angle adjustment is continuous and micrometer-precise. The downside is cost — the base unit alone is $255, and you still need to supply your own stones. But for chefs, culinary students, and anyone who owns a rack full of high-end kitchen knives, the Edge Pro Apex is arguably the best guided system available.
Wicked Edge — The Mirror Edge Machine
At $450+ for the base Wicked Edge WE60 (and over $1000 for the top-tier models), the Wicked Edge is in a class of its own. It sharpens both sides of the blade simultaneously with twin guide arms, cutting your time in half and ensuring perfect symmetry. The dual-arm design also makes it far easier to create compound bevels — you can set a 15° primary bevel and a 20° micro-bevel by simply adjusting the arms between grits.
The Wicked Edge is overkill for almost everyone. But if you want mirror-polished bevels that look like they came off a $50,000 CNC grinder, nothing else in the consumer market comes close. It’s the system competitive sharpeners use to win “hair-whittling edge” bragging rights on knife forums.
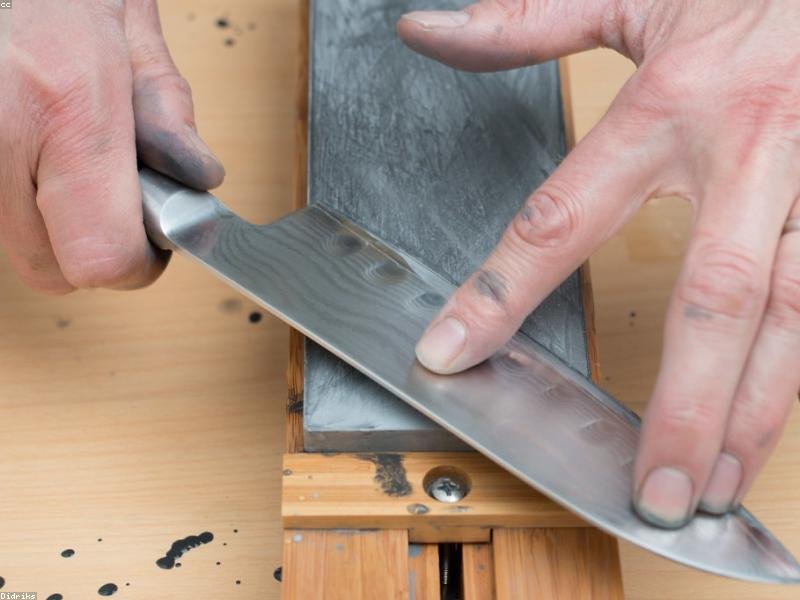
Freehand Sharpening — The Case for Learning the Skill
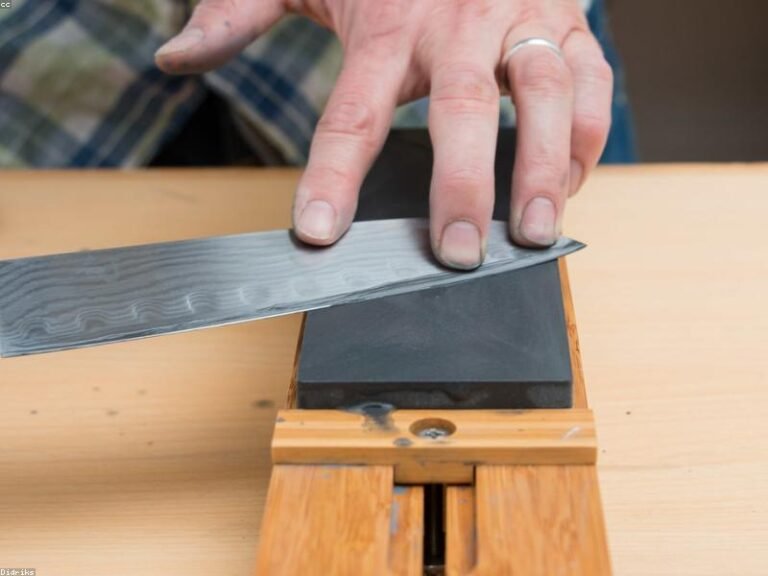
Freehand sharpening on whetstones has one massive advantage that no guided system can match: speed. Once you’ve developed angle control, you can take a dull knife from burr formation to finished edge in under five minutes. The same knife on a guided system takes two to three times longer due to clamping, repositioning, stone changes, and angle verification between stages.
Freehand sharpening also costs less over time. A single quality 1000-grit stone ($40-50) will outlast most sharpeners’ lifetimes and sharpen hundreds of knives. A guided system’s stones, clamps, and guide rods eventually wear and need replacement — and the initial hardware investment ranges from $45 to $1000+.
But the biggest long-term benefit of learning freehand is that it makes you a better sharpener. When you sharpen freehand, you learn to read the edge — to feel the burr forming, to hear the sound change as the bevel makes full contact, to see the scratch pattern evolve as you refine the grit. These skills transfer to any sharpening scenario, including guided systems when you need them. A freehand sharpener who picks up a guided system becomes deadly precise. A guided-system-only sharpener who picks up a whetstone is lost.
Jigs vs Freehand: The Decision Matrix
| Factor | Guided System (Jig) Winner | Freehand Winner |
|---|---|---|
| Angle consistency | ✅ Perfect from day one | ❌ Months of practice |
| Speed (per knife) | ❌ 15-30 min | ✅ 5-10 min |
| Initial cost | ❌ $45-$1000+ | ✅ $30-80 |
| Edge quality ceiling | ✅ Consistent mirror bevels | ✅ (tied) — if you have the skill |
| Versatility (blade shapes) | ❌ Struggles with recurves, long flex blades | ✅ Handles any blade shape |
| Learning curve | ✅ 30 minutes to good results | ❌ Weeks to consistent results |
| Skill development | ❌ Teaches geometry, not feel | ✅ Builds transferable skills |
The Best of Both Worlds
Here’s the honest recommendation most sharpening guides won’t give you: do both. Learn freehand sharpening on a decent 1000-grit stone — you need the skill regardless. It’s faster, cheaper, and teaches you to read an edge. Then add a guided system for the knives where absolute precision matters: your expensive pocket knife with S35VN steel, your showpiece chef’s knife that you want to maintain at exactly 15°, or batch sharpening where consistency across multiple blades matters.
If budget is tight, start with a good 1000-grit whetstone and learn freehand. If you want immediate, frustration-free results, grab the Work Sharp Precision Adjust — it’s the best value guided system on the market and produces edges that rival systems costing three times as much.
Either path leads to sharp knives. The worst path is doing nothing because you couldn’t decide which path to take.