Knife Sharpening Mistakes Beginners Make ? 7 Ways You’re Actually Making Your Knife Duller
You’re probably making your knife duller right now. Not through neglect — through effort. Every time you sharpen with the wrong angle, the wrong pressure, or the wrong stone sequence, you’re not restoring the edge. You’re destroying it. Methodically. Precisely. And because the damage is microscopic, you won’t notice until the knife stops cutting entirely — at which point you’ve already removed steel you can never get back.
Here are the 7 sharpening mistakes that took me 15 years, dozens of ruined edges, and approximately 3 millimeters of lost blade height to fully understand. Fix even three of them, and your next sharpening session will produce the best edge you’ve ever made.
Mistake #1: Starting With Too Fine a Stone
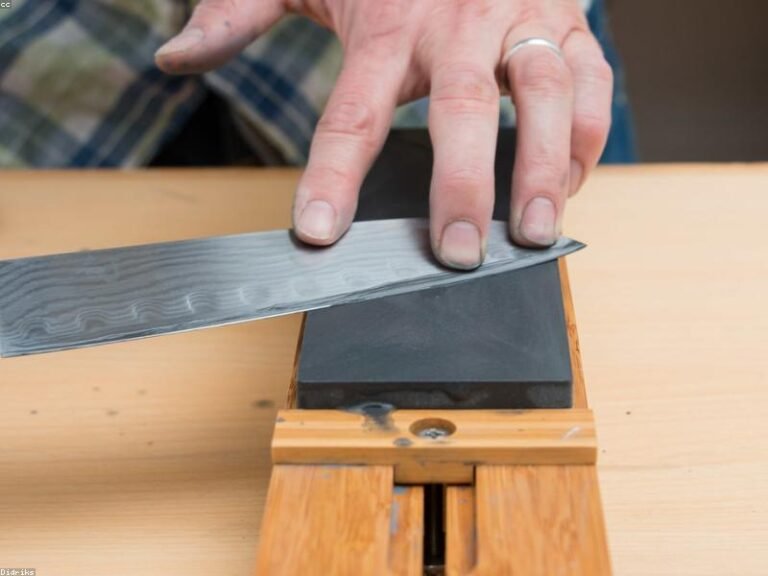
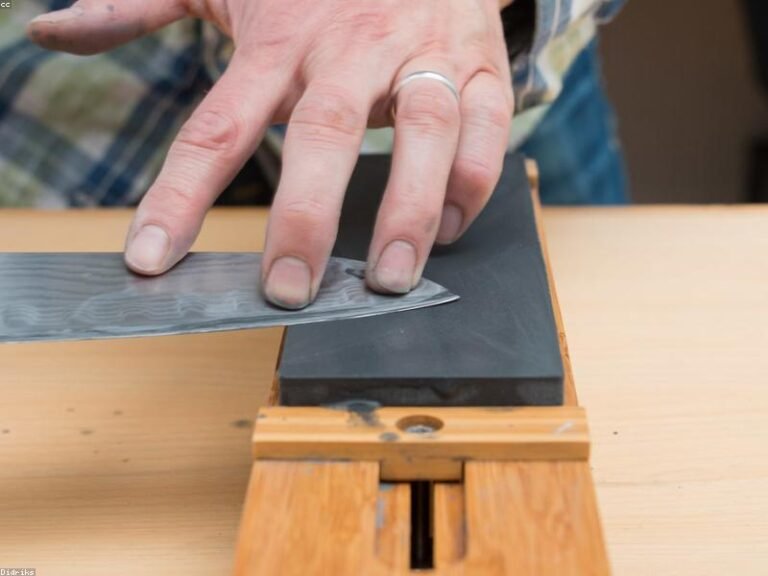
This is the #1 error I see — by an enormous margin. Someone picks up a 1000-grit whetstone, starts working a knife that’s been dull for 6 months, and 45 minutes later wonders why the edge won’t even catch on printer paper.
Here’s what’s happening: a 1000-grit stone removes steel at roughly 1.5 microns per pass. If your edge has rounded over to a 50-micron radius (invisible to the naked eye), you need 35+ passes just to reach the apex — before you’ve even started forming a new one. On a 400-grit stone that removes at 5 microns per pass, you’re apexed in 10 strokes. Then you refine with the 1000-grit.
The fix: Start coarse. If your knife won’t slice paper cleanly, begin at 320-400 grit. Form the apex. Then — and only then — move to 1000 grit. You’ll spend less time and remove less total steel. Counterintuitive but absolutely true: coarser stones preserve blade steel because they work faster.
King 1000/6000 Whetstone — | For coarse work: Atoma 400 Diamond Plate —
Mistake #2: Inconsistent Angle — The Edge Roulette
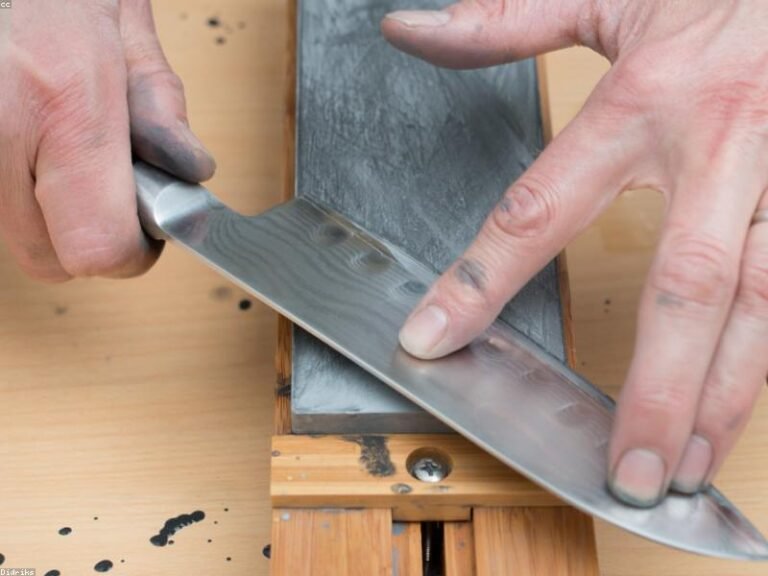
You’re not as steady as you think. I measured my own angle consistency on video — using a digital protractor overlay — and discovered I was wobbling between 14 and 22 degrees within a single stroke. That’s not an edge. That’s a collection of randomly angled facets that share a general direction.
An inconsistent angle does two terrible things simultaneously: it rounds the apex (making the knife duller than when you started) and it creates a convex bevel shape that gets progressively worse every time you sharpen. After 10 sharpening sessions on a wobbling hand, your edge geometry is so distorted that even a professional needs to reprofile.
The fix for under $20: Clip-on angle guides like Wedgek Angle Guides. Set your blade against the guide before each stroke. Your muscle memory will develop faster than you think, and in the meantime, you’re not ruining knives.
The fix for under $60: The Work Sharp Precision Adjust clamps your knife and locks the angle. You turn a dial to 17 degrees and every single stroke hits at exactly 17 degrees across the entire blade. The edge that comes off this system is geometrically perfect — flat bevels meeting at a crisp apex with zero rounding.
Wedgek Angle Guides — | Work Sharp Precision Adjust —
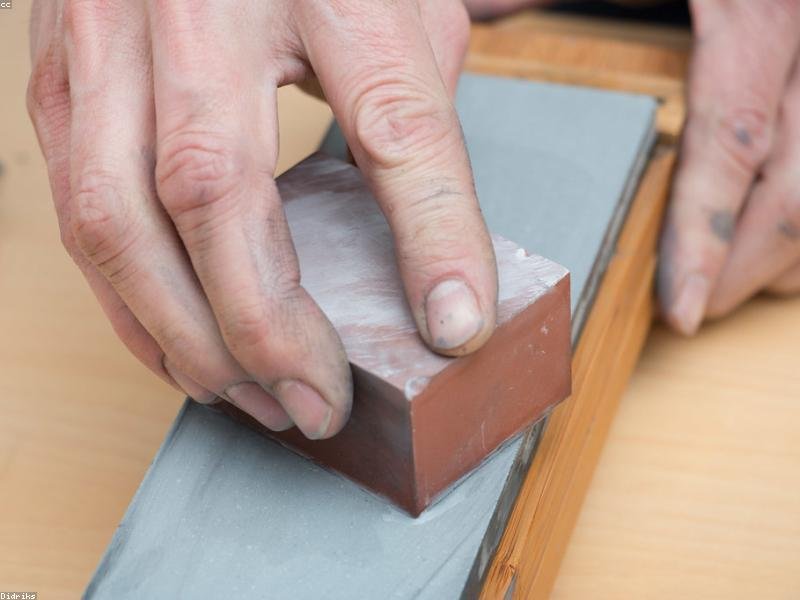
Mistake #3: Crushing the Blade — Too Much Pressure
Push hard on a whetstone and you’re not sharpening faster — you’re creating a burr so massive and uneven that it folds over instead of breaking off cleanly. That folded burr? It feels sharp for about 45 seconds of cutting, then it tears off, taking a chunk of your apex with it. Now you’re duller than when you started.
The right pressure for sharpening is 1-2 pounds of force — roughly the weight of your hand resting on the blade, nothing more. Let the abrasive do the work. Your job is to guide the knife, not force it through the stone. When you lighten up to nearly zero pressure for the final few strokes on each side, the burr minimizes and breaks off cleanly, leaving a crisp apex instead of a ragged one.
The fix: Sharpen next to a kitchen scale. Press your knife onto it and feel what 1-2 pounds actually feels like. It’s less than you think. Way less.
Mistake #4: Skipping the Burr — No Apex, No Edge
If you can’t feel a burr, you haven’t apexed. Period. The burr — that microscopic wire edge that forms when two bevels finally meet — is the only reliable signal that you’ve reached the cutting apex. Without it, you’re polishing shoulders and leaving a rounded, dull edge.
Run your fingertip gently across the non-sharpened side (perpendicular to the edge). You should feel a fine, consistent wire edge running the entire length of the blade — like a very faint hook catching your fingerprint ridges. If you don’t feel it on the heel, the belly, and the tip, keep going on that section. No burr = no apex = no sharp knife.
The burr should be detectable but minimal — if you can see it glinting in the light, you’ve gone too far and created excessive steel deformation. Lighten your pressure on the next grit.
Mistake #5: The “Strop Confusion” — Polish Without Burr Removal
Stropping does not remove a burr. Let me repeat that: stropping does not remove a burr. What stropping actually does is align the microscopic teeth of a properly apexed and de-burred edge, burnishing them to a high polish.
If you strop a knife that still has a burr attached, you’re doing the equivalent of polishing a car with a dent in the door. The burr gets burnished — flattened against the edge — and looks shiny. But it’s still a burr, and it’ll fold the instant it hits anything harder than air.
The fix: Remove the burr on your finishing stone first. Light, alternating passes at your finishing angle. Then drag the edge through a cork or soft wood once to mechanically strip any remaining fragments. Then strop. A BeaverCraft leather strop loaded with green compound will produce a mirror edge — but only if the burr is already gone.
Mistake #6: Sharpening a Dirty Knife — Contamination Destroys Stones
Food residue, pocket lint, rust, and old oil don’t just sit on the blade — they transfer to your stone. Once embedded in the stone’s surface, those contaminants create irregular high spots that gouge your edge instead of polishing it. A whetstone contaminated with pocket lint produces an edge that looks like a saw blade under magnification.
Your stone is porous. Aluminum oxide and silicon carbide stones absorb whatever you put on their surface. A clean stone produces a clean edge. A dirty stone — well, you just spent 20 minutes creating a dirty edge.
The fix: 30 seconds with dish soap, warm water, and a paper towel before the knife touches the stone. For pocket knives, a quick wipe with isopropyl alcohol removes oils and adhesive residue that water misses.
Mistake #7: Using a Sharpening Steel on Japanese Knives
This is the mistake that physically hurts to watch. Someone buys a $150 Shun, uses it for three months until it loses its bite, and runs it across a ribbed sharpening steel exactly as the guy at the kitchen store demonstrated — on a W??sthof.
The result, visible under 60?? magnification: a 15-degree VG-10 edge, hardened to 61 HRC, now covered in micro-chips where the steel’s longitudinal ridges impacted the brittle edge. Each chip is 5-15 microns deep — invisible to the naked eye — but the cumulative effect is an edge that looks like a microscopic serrated bread knife. Jagged, inconsistent, and duller than when you started.
The fix: Japanese knives above 60 HRC get a ceramic honing rod ONLY. No ridges, no grooves — just a smooth, 1200+ grit ceramic surface that realigns without impacting. The Idahone 12-inch Fine Ceramic Rod at $35 is the standard. Your Shun will thank you with years of faithful service instead of months.
Idahone 12″ Ceramic Honing Rod —
Bonus Mistake: Sharpening Too Often (Yes, Really)
Every pass on a whetstone removes steel. Every. Single. Pass. The goal of sharpening isn’t to have the sharpest knife at all times — it’s to maintain a functional edge while preserving as much blade steel as possible over the knife’s lifetime.
Sharpening weekly when your edge just needs a 15-second honing session is like replacing your car’s brake pads every time they squeak. You’re solving a non-problem and accelerating your knife toward the trash.
Test first. Hone first. Sharpen only when both fail. That’s the order. When you follow it — when you’re truly sharpening only 4-6 times per year instead of weekly — your knives last decades instead of years. A W??sthof chef knife maintained this way will still be slicing paper-thin tomato slices when your grandchildren inherit it.
The Beginner’s Kit That Prevents Every Mistake on This List
Walk into any knife forum and someone will tell you to freehand on a $200 Shapton glass stone for your first sharpening session. That’s terrible advice. You need tools that prevent mistakes while you build skill:
- Work Sharp Precision Adjust — eliminates angle inconsistency (Mistake #2) with a guided rod system that locks your angle.
- King 1000/6000 Whetstone — the 1000 side cuts fast enough that you’re not tempted to overshoot the grit (Mistake #1); the 6000 side polishes without creating a false edge.
- Idahone Ceramic Honing Rod — prevents Mistake #7 and reduces how often you need to sharpen at all (Bonus Mistake).
- BeaverCraft Leather Strop — for post-burr-removal polishing (Mistake #5).
That’s the kit. Total cost: under $150 — roughly the price of one prematurely-ruined chef knife. When you’re pulling that edge through a ripe tomato three months from now and feeling zero resistance, you’ll realize these tools didn’t cost you anything. They saved you money.
Here’s one more thing about burr formation that most guides skip entirely: the burr should form evenly across the entire blade before you flip sides. If you’re only getting a burr on the heel and belly but not the tip, slow down and focus your strokes on the tip section. A partial burr = a partial edge.
BladeOwl.com is reader-supported. When you buy through our links, we may earn a commission at no extra cost to you.